Step 1: Open the password-protected Excel file by entering the correct password.
Step 2: Navigate to the menu and select File > Info > Protect Workbook > Encrypt with Password.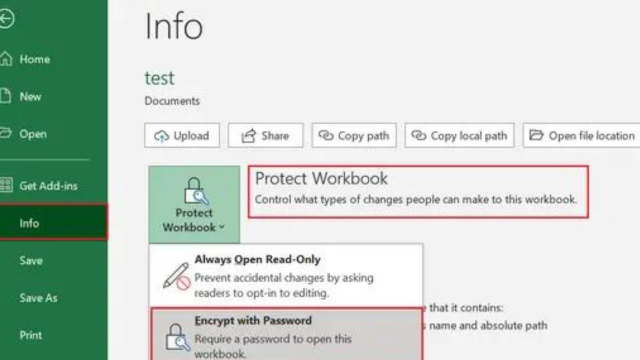
Step 3: In the dialog window that appears, delete the existing password. This ensures that you won’t be prompted to enter a password the next time you open the workbook.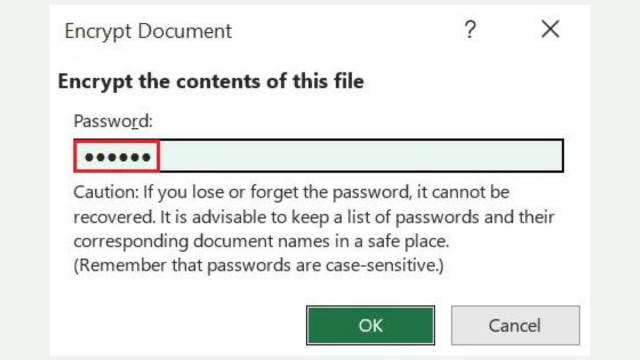
Step 4: Save the Excel workbook. The password protection is now removed, allowing the file to be opened without needing a password.
How to Effortlessly Unprotect an Excel Sheet: A Step-by-Step Guide
Unprotecting a single Excel worksheet is quick and easy, allowing anyone to edit it with just a few clicks.
Step 1: Go to the Review menu and select the Unprotect Sheet option.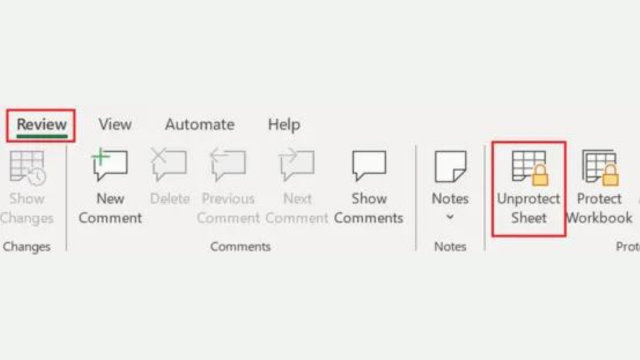
Step 2: If the worksheet is protected with a password, you’ll be prompted to enter it.
Result: Once the correct password is entered, the Excel sheet will be unprotected, enabling any user to freely edit the worksheet.
What to Do If You’ve Forgotten Your Excel File Password: Quick Solutions
If you’ve lost the password to your Excel file, try these steps:
- Check for Backups: Look for any non-password-protected versions.
- Use Recovery Tools: Try specialized password recovery software.
- Contact IT Support: Get help from your organization’s IT department.
- Restore from Backup: Use an earlier version of the file if available.
- Consider Professional Services: For critical files, seek professional recovery services.
Avoid brute force methods unless absolutely necessary.
How to Unprotect an Excel Sheet Without Knowing the Password?
If you need to unprotect an Excel worksheet but don’t know the password, you can try the following method. Note that this involves file manipulation and may not work with all versions of Excel. Unhide the first column or row in excel worksheets. Proceed only if you are authorized to do so.
Step 1: Create a Backup
- Make a copy of the Excel file. Work with the copied version to avoid losing the original file if mistakes are made.
Step 2: Open the File with 7-Zip
- Right-click the copied file and open it using 7-Zip. If 7-Zip is not installed, download and install it for free.
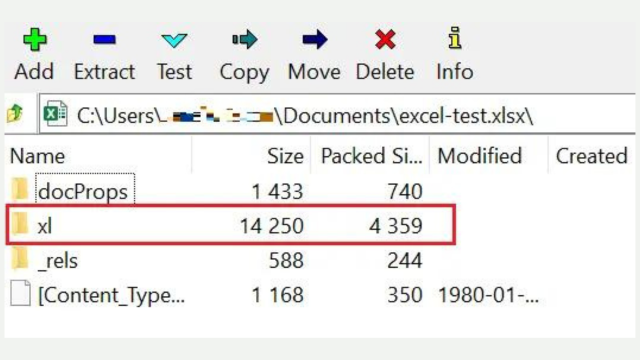
Step 3: Navigate to the xl Folder
- In 7-Zip, open the xl folder.
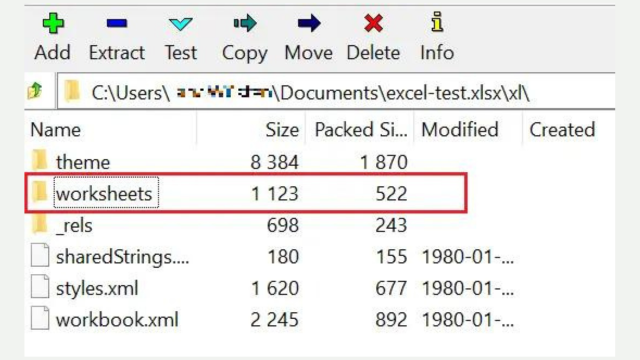
Step 4: Access the Worksheets Folder
- Inside the xl folder, open the worksheets folder.
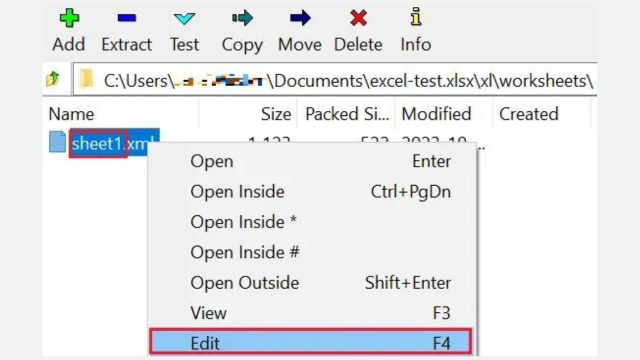
Step 5: Edit the Worksheet XML File
- Locate the file corresponding to the protected sheet, e.g., sheet1.xml.
- Right-click on it and select “Edit” or press [F4] to open it in a text editor.
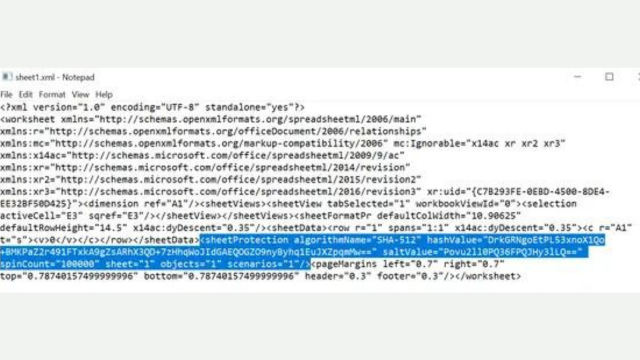
Step 6: Remove the Sheet Protection
- Enable text wrap in the editor. Look for the string <sheetProtection and select the entire entry up to the closing />. Delete this entry carefully to avoid damaging the XML structure.
Step 7: Save and Close
- Save the changes in the text editor. When prompted by 7-Zip to update the file in the archive, confirm the changes and close 7-Zip.
Result: Open the modified file in Excel. The sheet protection should be removed, allowing you to edit the worksheet. Note that this method will not reveal the original password, as it is stored in a hashed format.
Conclusion
In conclusion, while losing the password to an Excel sheet can be frustrating, there are advanced methods to unprotect the sheet without it. By carefully following the steps to manipulate the XML structure of the file using 7-Zip, you can remove the protection and regain access to the worksheet.
However, this method should only be used if you are authorized to do so, as it involves altering the file’s structure. It’s important to note that this process won’t recover the original password, but it will allow you to edit the previously protected sheet. Always proceed with caution and make backups to avoid any unintended data loss.
Stay ahead of the curve by bookmarking our website for the latest technology articles. Whether you’re interested in cutting-edge software tips, tech news, or in-depth guides, our site is your go-to resource. Don’t miss out on the trends and insights that can keep you informed and empowered in the fast-paced world of technology. Make sure to visit us regularly for updates.